Set Up One Search
Your teachers and students can take advantage of your school’s subscription databases all in one place, through Destiny One Search. One Search saves staff and patrons time and effort by letting them search the catalog and multiple free and subscription databases all at once, with a single search request. In addition, patrons do not need to remember the URLs, usernames and passwords for multiple databases.
Before You Begin
Before you begin the setup process, you need the following:
- Your customer number, which can be found in your welcome letter.
- The URL location and the version of the web-based library catalogs you want to make available to your users.
- Usernames and passwords for paid subscription databases.
- IP addresses of your library web server for IP-authenticated subscription databases, if applicable.
- A custom URL, if one is required, to access subscription databases.
| Important: Set the permissions for those responsible for adding and editing One Search databases. See Access Levels for One Search. |
Set Up One Search Site Configuration Settings
You can set up the One Search site configuration settings as a Destiny Administrator or Site Administrator.
Set up site configuration settings:
- Log in as the Destiny Administrator or a Site Administrator.
- Do one of the following:
If you log in as a... Then... Destiny Administrator - On the district Welcome page, click Setup.
- On the Sites sub-tab, find the site that will use One Search, and then click
 .
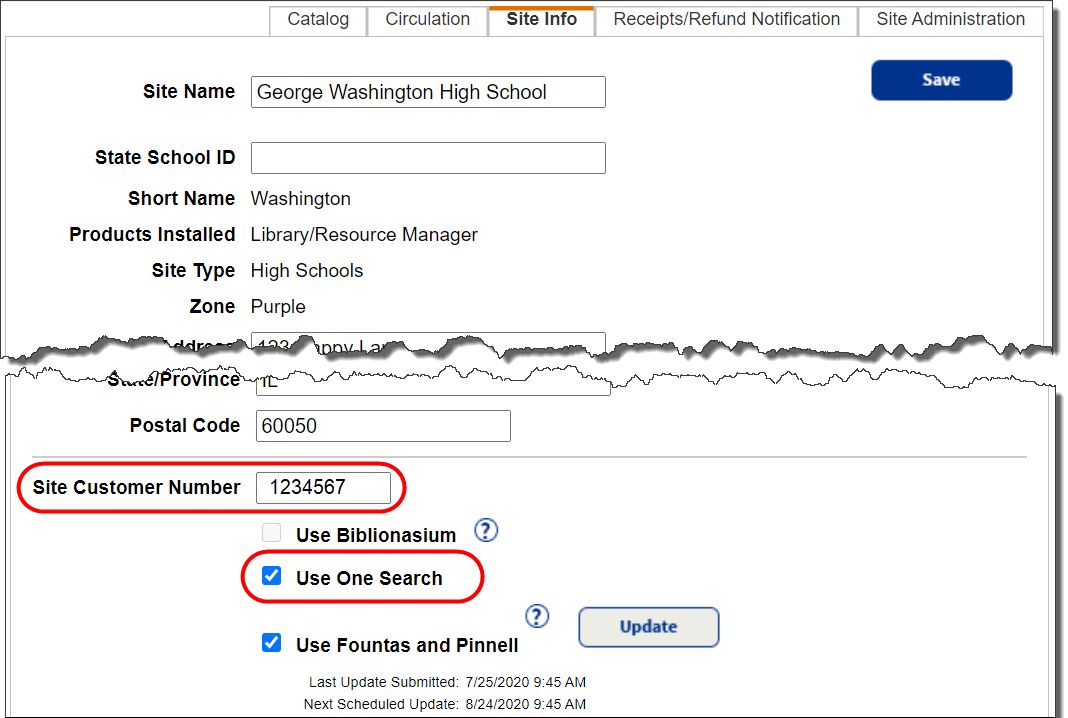
. - Confirm that the site’s customer number is correct.
- Select the Use One Search checkbox.
- Click Save.
Site Administrator - Select Admin > Site Configuration > Site Info sub-tab.
- Confirm that the site’s customer number is correct.
- Select the Use One Search checkbox.
- Click Save.
For more information about One Search, see Add One Search Databases.