Assign or Remove a Copy from a Category
There are multiple ways to assign copies to or remove copies from a Copy Category.
Assign copies to a Copy Category
To add copies from a Resource List, barcode list, or by a range of dates:
- Select Catalog > Library Search > Copy Categories sub-tab.
Note: If you are a Textbook Manager or Media Manager user, select Catalog > Textbook Search or Media Search > Copy Categories sub-tab. - Next to the Copy Category you want to add copies to, click
 .
. Note: If the category you want to assign copies to does not exist yet, start by creating a new category.
- Do one of the following:
If you want to... Then... Add copies from a Resource List - From the Select by drop-down, select List.
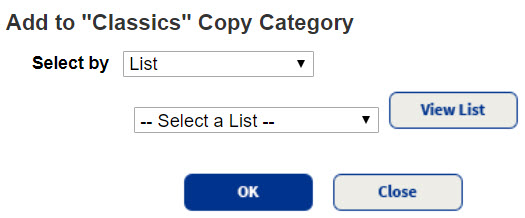
- From the next drop-down, select the list you want to use. If you want to see the contents of the list, click View List.
Note: Only copies in your collection will be added.
Add copies from a barcode list (browse to an existing one, or create one)
- From the Select by drop-down, select Barcode List.
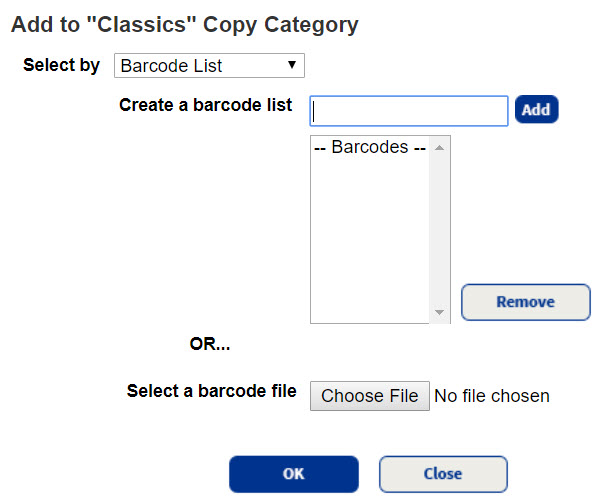
- Add a list of barcodes:
- To add an existing file, click Choose File, and then browse to the file you want to add.
- To create a list, type or scan barcodes in the Create a barcode list field.
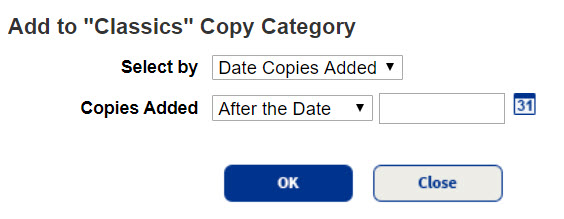
Add all copies added to Destiny on a specific date or before/after a date - From the Select by drop-down, select Date Copies Added.
- From the Copies Added drop-down, select After the Date, On the Date, or Before the Date, and then select a date.
- From the Select by drop-down, select List.
- Click OK. A message indicates how many copies were added.
|
Note: You can also add copies from a Copy Category's Search Results page. At the top of the page, click +to This Category. |
To assign a Copy Category while adding or editing a copy record:
You can also assign Copy Categories in the following ways:
- Assign a Copy Category during import.
- Perform an
- Perform a Global Update to change the contents of one of the following fields of every copy in a category: Call Number Prefix, Category, Circulation Type (not available for Media Manager), Description, Funding Source, Sublocation, or Vendor. You can use this feature to change all copies in one category to another.
Note: The Global Update feature is not available in Textbook Manager.
Remove a copy from a Copy Category
To view and remove one or more copies from a Category:
- Select Catalog > Library Search > Copy Categories sub-tab.
Note: If you are a Textbook Manager or Media Manager user, select Catalog > Textbook Search or Media Search > Copy Categories sub-tab.
- Next to the Copy Category you want to remove a title from, click View.
- Next to the title you want to remove, click the Show More drop-down to see the copies in the Copy Category.
- Do one of the following:
- To remove an individual copy: Next to the title you want to remove, click Remove.
- To remove all copies: Click Remove All, and then from the pop-up that appears, click Yes.
|
Note: You can also remove a Copy Category from an individual copy record. |